
You need to be able to back up your sensitive data. You should also be able to restore that backup if necessary. The subject of this post is to teach you how to back up data in Windows 10 as well as recover it.
Backup your PC with File History
This requires an external drive or network location. Select Start > Settings > Update & Security > Backup.

Do you want that pc itself creates backup automatically? If yes, turn on Back up using File History. However, before doing anything, it is best to first click on the More Options button.
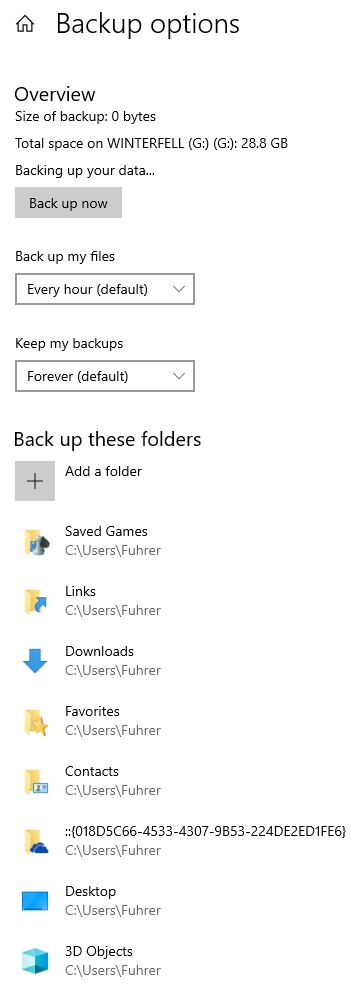
If Windows has detected an external drive, you can click Backup now to it creates a backup.
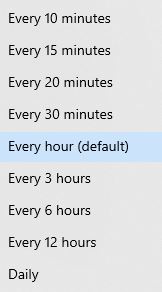
- Backup my files: You need to specify that your data be backed up daily, every few hours, or even every few minutes. (Of course, if the automatic backup mode is on). The default option is every hour.
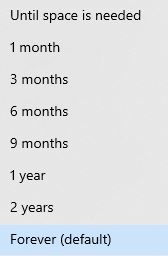
- Keep up my backups: Here you must specify how long each backup file should remain in the saved location. In other words, you have to specify here when this file should be deleted. Anyway, the external storage device is limited in volume. So it is better to delete old backups over time so that there is free space to create new files. As you can see in the figure below, the default option is to never delete these files automatically. Be careful of the possible consequences of this choice.
A number of user folders have been selected by Windows for backups by default. You can:
- Select other folders: Click Add a folder.
- Remove any of these folders from the backup process: Click on the desired folder and then select Remove.
- Remove the subfolder from the backup process: In the “Exclude these folders” section, click on add a folder.
From now on, Windows will back up the specified folders at specified times to a location on the network / an external drive. Or you can do it manually.
Now suppose one or more of this information was deleted by mistake or by accident. The backup you made will now come to your aid. Just go to the location where the backup files are stored, then select the file or files you want and copy them to the location you want.
Backup and Restore (Windows 7)
You can also make more advanced and powerful backups. In fact, it is possible to make a complete backup file of the entire drive on which Windows is installed (or in fact any of the computer drives). But first of all, it is better to get acquainted with the concept of system image file.
What’s System Image?
A system image is a file — or set of files — that contains everything on a PC’s hard drive, or just from one single partition. A system imaging program looks at the hard drive, copying everything bit by bit. You then have a complete system image you can copy back onto a drive to restore the system state. The system image contains a complete snapshot of everything on the computer’s hard drive at any given time. So, if you have 500 GB of space used on a 1 TB drive, the system image will be about 500 GB. You should use the same tool you used to create the system image to restore it. Windows itself creates system images that contain multiple files with the .xml and .vhd file extensions.
Source of this section: howtogeek.com
Create a Backup with System Image
Select the Start button, then select Control Panel > Backup and Restore (Windows 7).
In the left pane, choose Create a system image, and then follow the steps in the wizard.

On the first page, you need to specify where this backup is stored.
- On a hard disk (it is better to choose a hard disk on which this Windows does not have the hard disk installed). This drive must be formatted with NTFS file system.
- On one or more DVDs
- On a location on the network (a shared folder that you have Write permission on it)
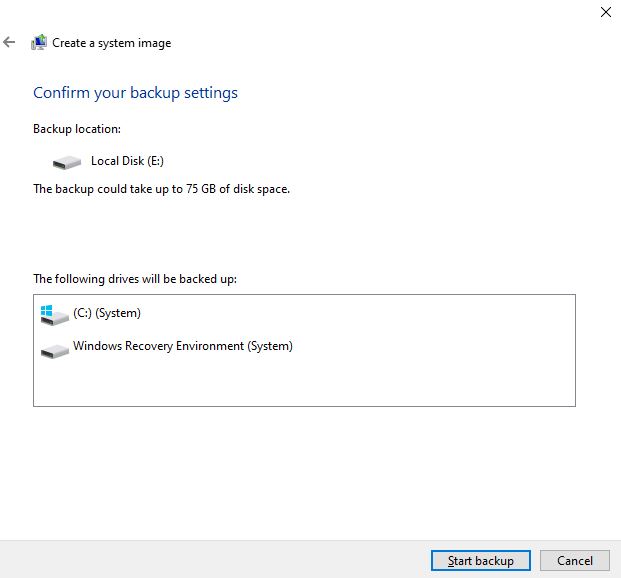
On the next page you need to specify which items should be backed up. As you can see, drive C is selected by default and cannot be removed from the selected mode. Why? Because Windows is installed on this drive and is actually the main item that must be present in the system image.
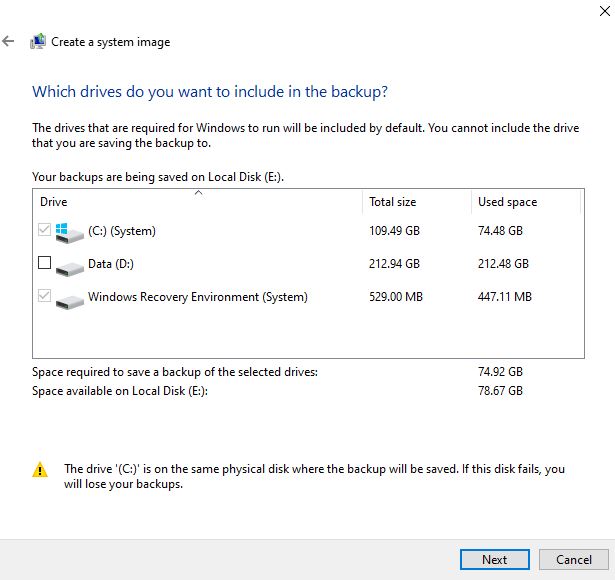
You can also select any of the other local drives. (Unless, of course, you want to save the backup to that drive)
On the third page, click Start Backup to begin the backup process.
When you are done, you will see that in a folder called WindowsImageBackup and inside the subfolder with the same name as the computer, there are the following folders:
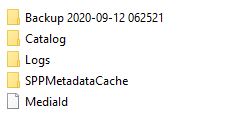
Remember that it is better to save this backup somewhere other than the hard drive on which Windows is installed, or at least save a copy of it on an external hard drive.
Create a Normal Backup
Select the Start button, then select Control Panel > Backup and Restore (Windows 7). Click on Set up backup.
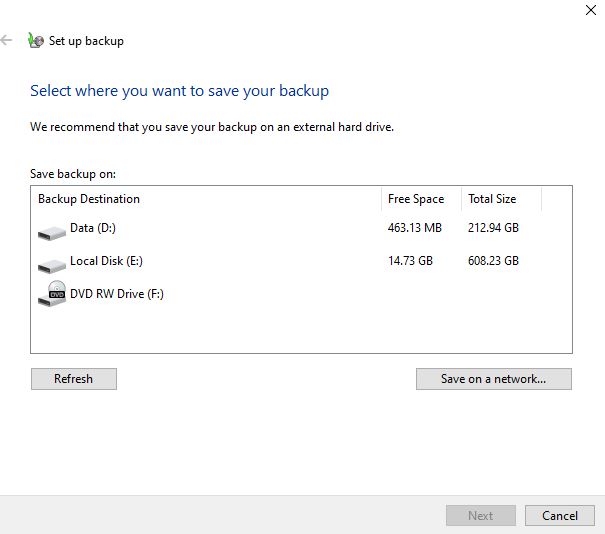
The wizard appears. On the first page you need to specify where this backup should be stored:
On the next page you have two choices:
- Let Windows choose (recommended)
- Let me choose
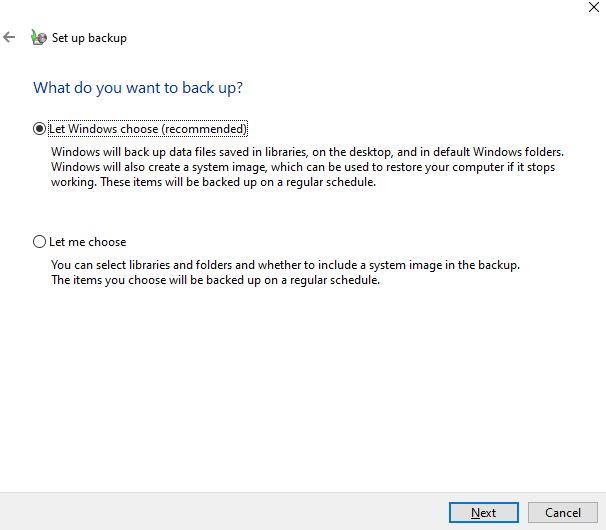
Let Windows choose (recommended): Window Will back up data files saved in libraries, on the desktop, and in default Windows folders. Windows will also create a system image, which can be used to restore your computer if it stops working. These items will be backed up on a regular schedule.
If you select this item, the following page will appear:
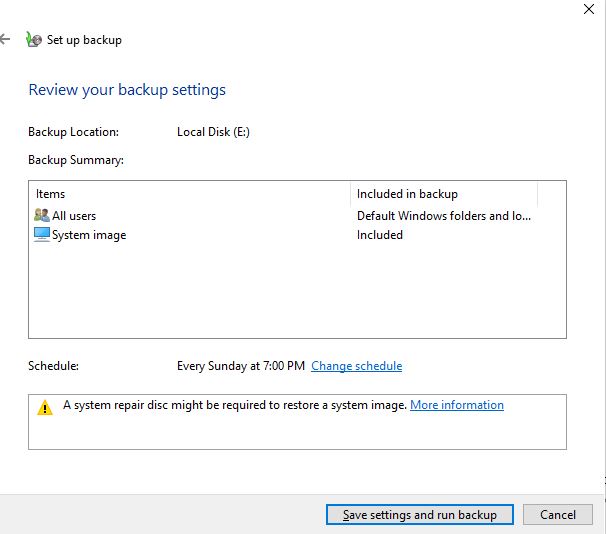
So, you can click on Save settings and run backup. Have you not seen all the settings and options on this page before in this post? Yes it is true. In fact, by selecting the default option, you are directed to create a backup with the system image.
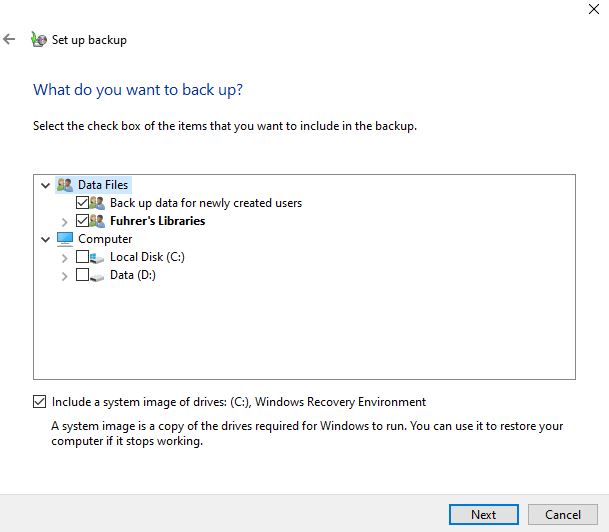
Let me choose: You can select libraries and folders and whether to include a system image in the backup. This items you choose will be backed up on a regular schedule.
If you select this item, the following page will appear:
As you can see, you can create a custom backup. You can even specify that this backup only contain files in one / more subfolders. You can even unselect “Include a system image of drives”.
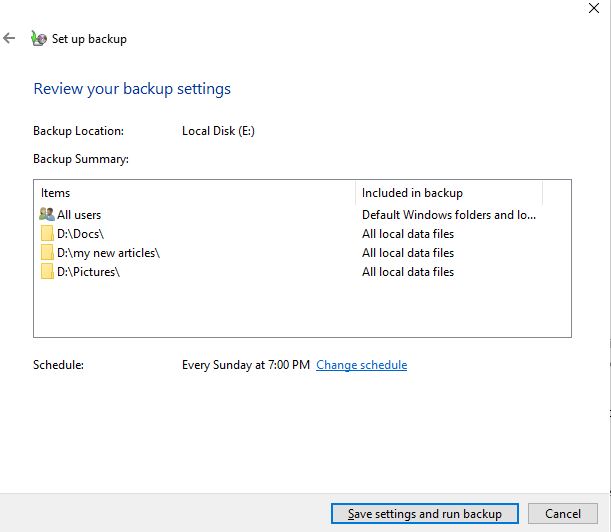
Then on the next page, you can save the settings and start the backup process. You can also click on change schedule to set the schedule for this backup.
So, you can click on Save settings and run backup. Have you not seen all the settings and options on this page before in this post? Yes it is true. In fact, by selecting the default option, you are directed to create a backup with the system image.
Let me choose: You can select libraries and folders and whether to include a system image in the backup. This items you choose will be backed up on a regular schedule.
If you select this item, the following page will appear:
As you can see, you can create a custom backup. You can even specify that this backup only contain files in one / more subfolders. You can even unselect “Include a system image of drives”.
Then on the next page, you can save the settings and start the backup process. You can also click on change schedule to set the schedule for this backup.
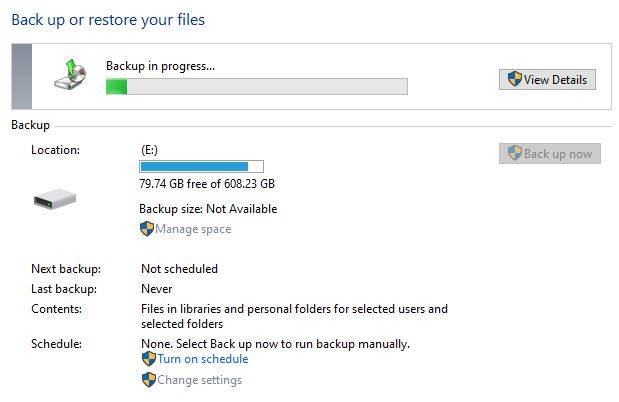
Picture of the process of creating this backup:
Restore
Select the Start button, then select Control Panel > Backup and Restore (Windows 7). Do one of the following:
- To restore your files, choose Restore my files.
- To restore the files of all users, choose Restore all users’ files.

Restore System Image Backup
When your computer (or Windows itself) crashes fatally, you should use system image backup and restore it. To do this, you must boot the computer with the repair disk.
So you must have created such a disk before this problem occurred. To make this disc, insert a CD or DVD into the disk drive of the computer and then Select the Start button, then select Control Panel > Backup and Restore (Windows 7).
Then in left panel, click Create a system repair disk. A dialog box appears. Select your disk drive and click Create Disk.
Keep the repair disk in a safe place.