Creating and managing user accounts is one of the most important steps in securing a computer. You need to be able to create a work account on your PC and manage its various aspects (such as password and expiration time, access level). The subject of this post is creating and managing user accounts.

There are three type account for sign in to windows 10:
- Local accounts
- Active Directory Domain Services (AD DS) domain accounts
- Microsoft accounts
Our assumption in this series of posts is that you are working with your personal computer (whether desktop or laptop) and your personal computer is not part of the same domain. Therefore, in this post, we will not talk about the second type (AD DS account) and we will discuss the first and third cases.

Local accounts exist in the local accounts database on your Windows 10 device.
A local account can only be granted access to local resources and, where granted, exercise administrative rights and privileges on the local computer. When you first install Windows 10, you are prompted to sign in using a Microsoft account or to create a local account to sign in with.
There are three user accounts exist by default in the local accounts database: (All of these are disabled by default)
- Administrator account
- DefaultAccount
- Guest account
Of course, when you install Windows 10, you create an additional user account with your desired name. This user account is a member of the local Administrators group and therefore can perform any local management task.
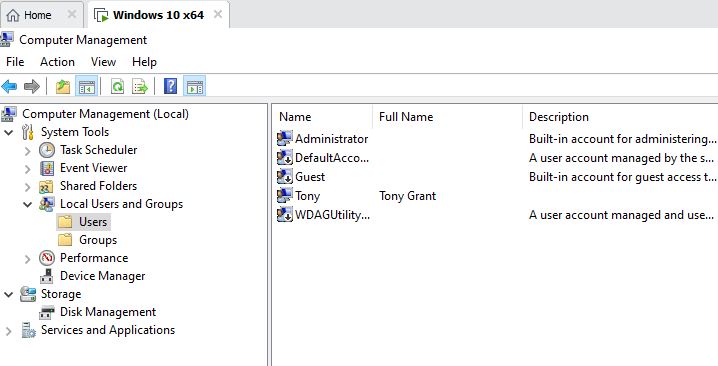
We can view the installed accounts, including the default accounts, by using the Computer Management console. Of course, there is not this capability in Windows 10 Home edition.
How can we run this console? There are several methods:
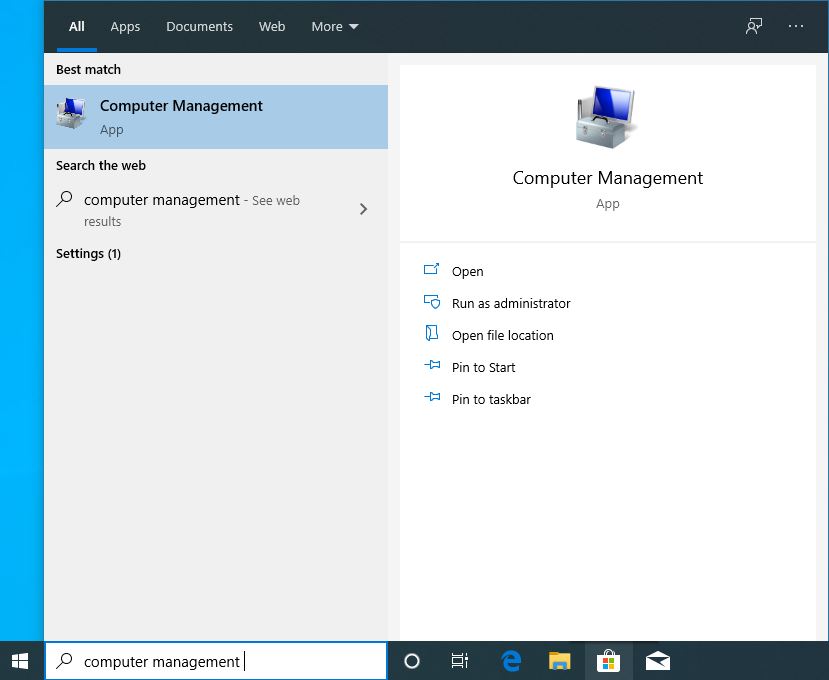
- Method 1: In taskbar and in search section, we can type “computer management”, as a result, this console appears as a response. We run it.
- Method 2: In control panel, then in Administrative tools, click on computer management
- Method 3: Type compmgmt.msc in Run window, and then press Enter key on keyboard.
- Method 4: In PowerShell, type the command mmc compmgmt.msc and press Enter on the keyboard.
- Method 5: In Command Prompt (cmd) window, type the command mmc compmgmt.msc and press Enter on the keyboard.
Anyway, when this console is launched, as you can see in the figure, in the left panel, below Local users and Groups, we click on Users. Then, on right panel and in an empty space, we right-click.
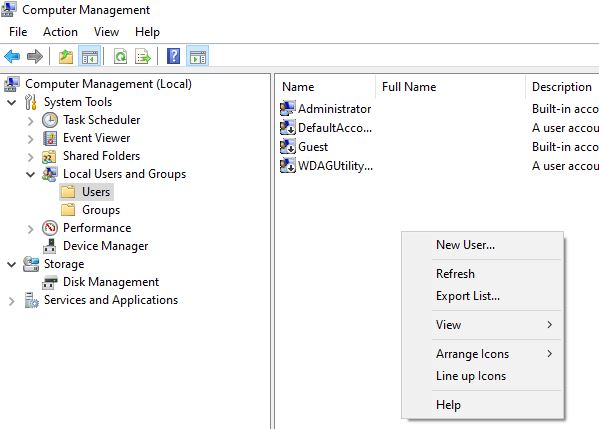
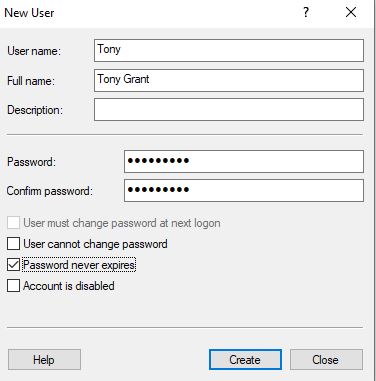
Now in the menu that appears, we click on the New User option. The New User dialog box will appear as shown below:
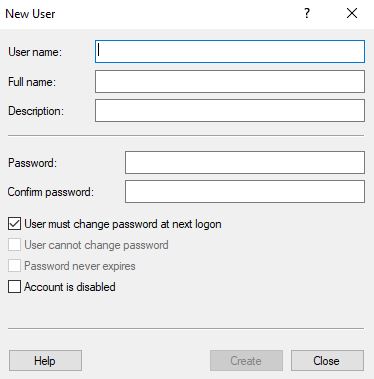
In this dialog box, there are the following boxes and checkboxes. Determining some of them is optional. Also it is not possible to select some checkboxes at the same time because they violate each other.
- User name: This field is necessary and require. Each user must has a unique user name.
- Full name: This field is optional. We can type user’ full name in this field.
- Description: This field is optional.
- Password and Confirm password: We must type password for this user in these both field. It’s recommended for yourself, type a complex password. Read this post about complex passwords.
- User must change password at next logon: We usually select this checkbox when we are creating a user account for another person. In this case, we define a temporary password for him/her (in the fields related to the password), then he/she must sign-in to windows. Immediately Windows will be ask him/her to set a new password for himself.
- User cannot change password: We usually select this checkbox when we are creating a user account for another person. In this case, we define a permanent password for him/her (in the fields related to the password), so that he/she cannot change this password and cannot define another password for himself/herself.
Note: The operating system will never allow us to select both recent checkboxes at the same time.
Note: If we do not select either of the above two checkboxes, the new user can change himself/herself password if he/she wishes.
- Password never expires: By default there is a validity period for passwords. (This validity period is adjustable). If we do not select this checkbox, the password will automatically expire after this validation period and the operating system will ask this user to define a new password. But if we select this checkbox then the password we define will never expire.
- Account is disabled: If we want this user account is disabled, we select this checkbox.
After filling in the required fields, we must click on the Create button to our user account creates.
Note: All fields of this dialog box will always be editable.
Example: My name is tony grant. I want create a user account for myself in my computer. I can fill these field as you can see in following picture:
Now my user account as you can see appears in the Users section of the Computer Management console:
Set user accounts access levels in Windows 10
Windows has two types of user accounts:
- Standard
- Administrator
Each one offering a different set of privileges to use a device and apps. The Administrator type provides complete system control, which means that an Administrator user account can change settings globally, install apps, and perform pretty much anything. The Standard User account type is more restrictive. This user account can perform all common daily tasks, such as run programs, check email and stream movies but can’t install new applications.
Also an Administrator user account can change other users account settings, instead a Standard user account even cannot change all itself settings.
From a security point of view, if a hacker accesses the sign-in information of a Standard user, he/she will not be able to cause fatal damage because this user account is very limited and weak in terms of authority and ability, but if a hacker can get sign-in information of an Administrator account on our computer, he/she can take complete control of the our computer and he/she will be able to do anything. Therefore, we must be very careful in defining the Administrator user accounts.
To secure your PC, it is recommended to have a standard account to prevent users from making changes that affect everyone who uses the computer, such as deleting important Windows files necessary for the system.
With these preliminaries, it is time to say that when we create an account in Windows, the above user account will be created as a Standard account. If needed, we can turn this account into an Administrator account. There are several ways to do this.
Method 1: Log-in to Windows with an Administrator type account. Then, open Control Panel and click User Accounts. Then click Manage another account:
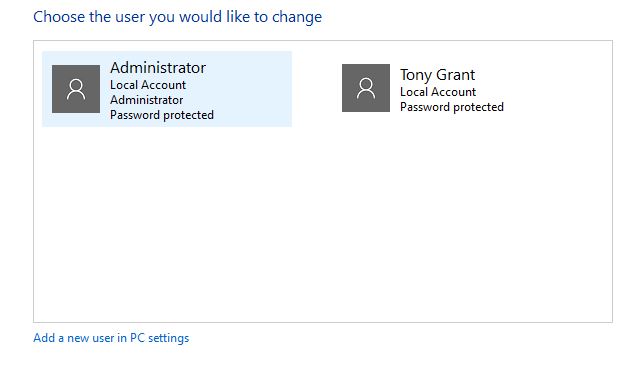
As you can see in the figure, here are all the computer user accounts. Our intention is to turn the Tony Grant account into an administrator account.
Note: You cannot add new accounts from this location. If you want to add a new account:
- Use Computer Management
- Click Add a new user in PC settings
- Use Windows PowerShell
Anyway, Click on Tony Grant user account. The following page will appear:

- Change the account name: For change user name of this account.
- Change the password: For changing password of this user account.
- Change the account type: This is the option we need. Click it. The following page will appear:
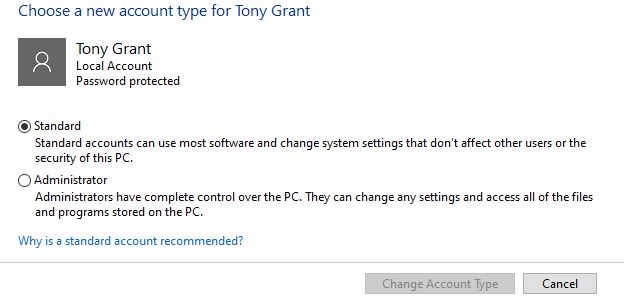
In this page, select Administrator and then click Change Account Type. OK. Tony Grant ‘user account is an Administrator-type account now. Similarly, you can convert an administrator-type account to a Standard-type user account.
- Delete this account: For deleting user account.
- Manage another account: For back to Previous page.
Method 2: In Windows, in addition to the user account, there is also the concept of user groups. For example, Administrators group. Each user account that is a member of this group will be an administrator-type account. So, it is enough to make our desired account a member of the Administrators group.
Log-in to Windows with an Administrator type account. Then, open Computer Management console. In below of Local User and Groups, double click on Groups.
In the right panel (as you can see in the figure) all the local groups of this computer are visible.
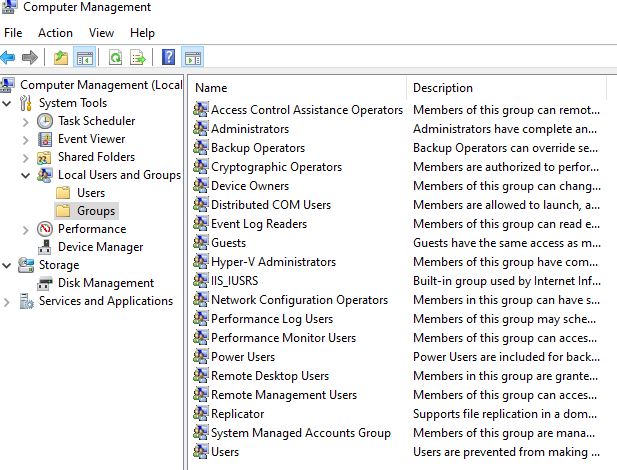
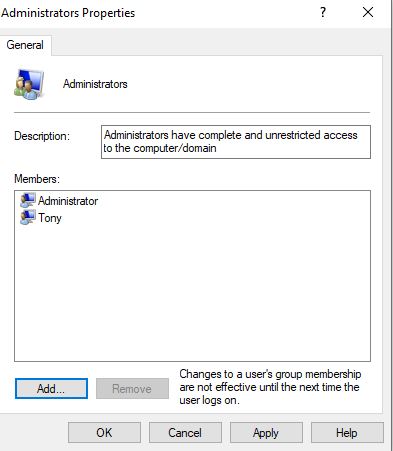
Click on Administrators. The Administrators properties dialog box will appears:
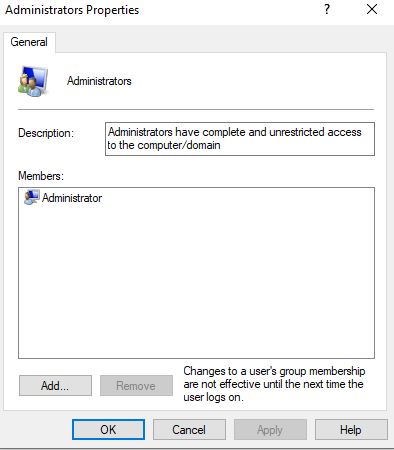
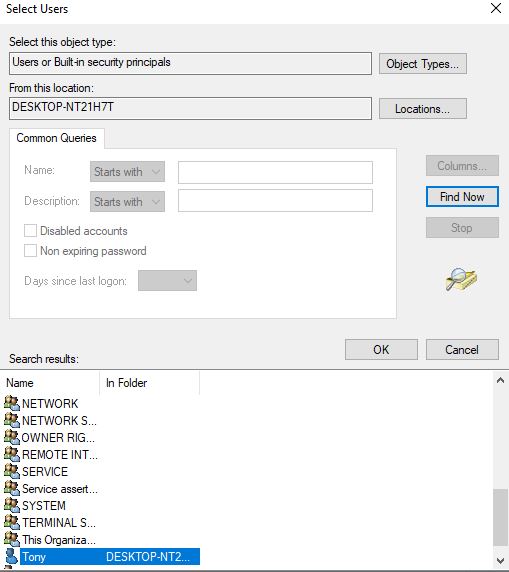
Now we need to make Tony a member of this group. The task is very simple. Click add. The select users dialog box will appears:
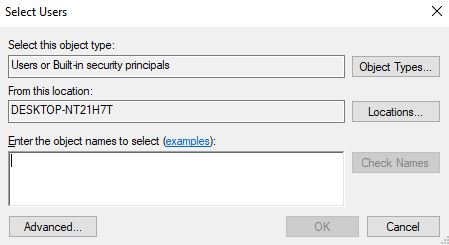
On this dialog box, click advanced button.
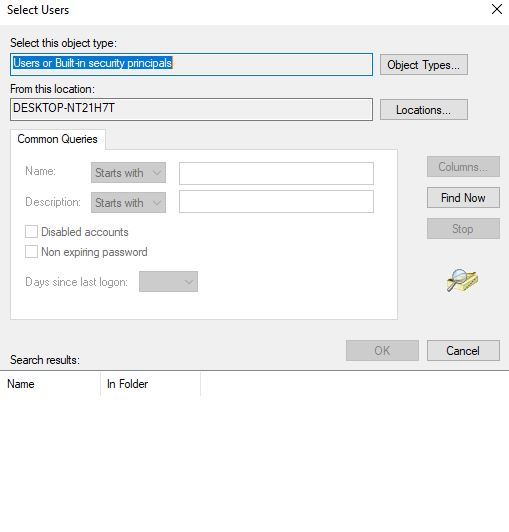
Now, click Find Now button. Immediately at the bottom of this dialog box, the search results section, all the accounts of this computer will appear. According to what you see in the figure, select the desired account and click on the OK button in all windows that open.
Tony is now a member of the Administrators group. This means that from now on it is an Administrator-type account.

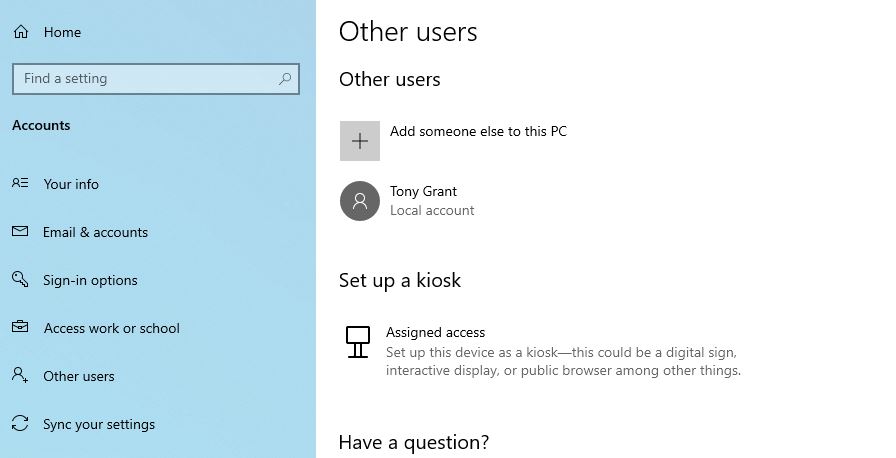
The preferred way to manage local accounts in Windows 10 is by using the Settings app. From Settings, click Accounts.
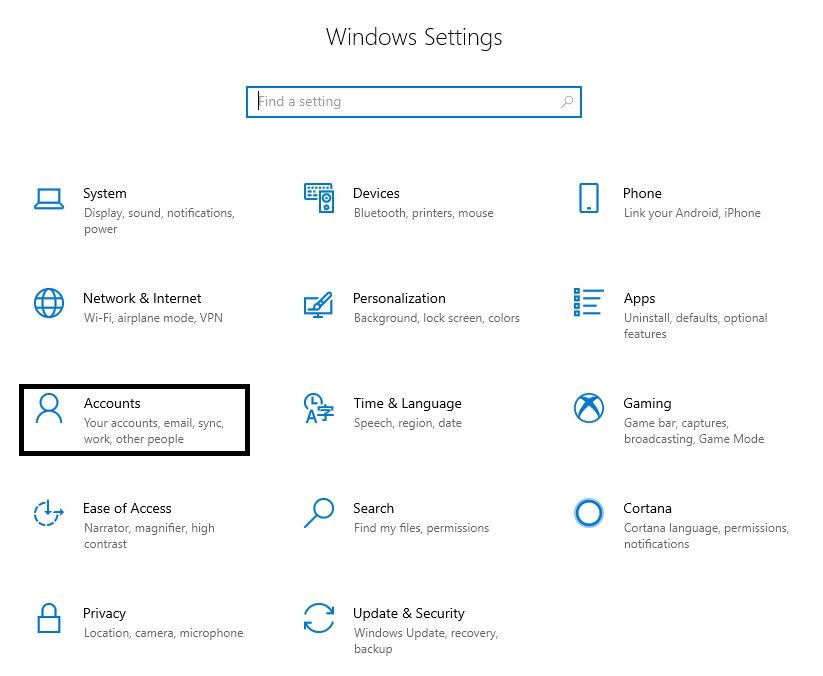
The following page will appears:
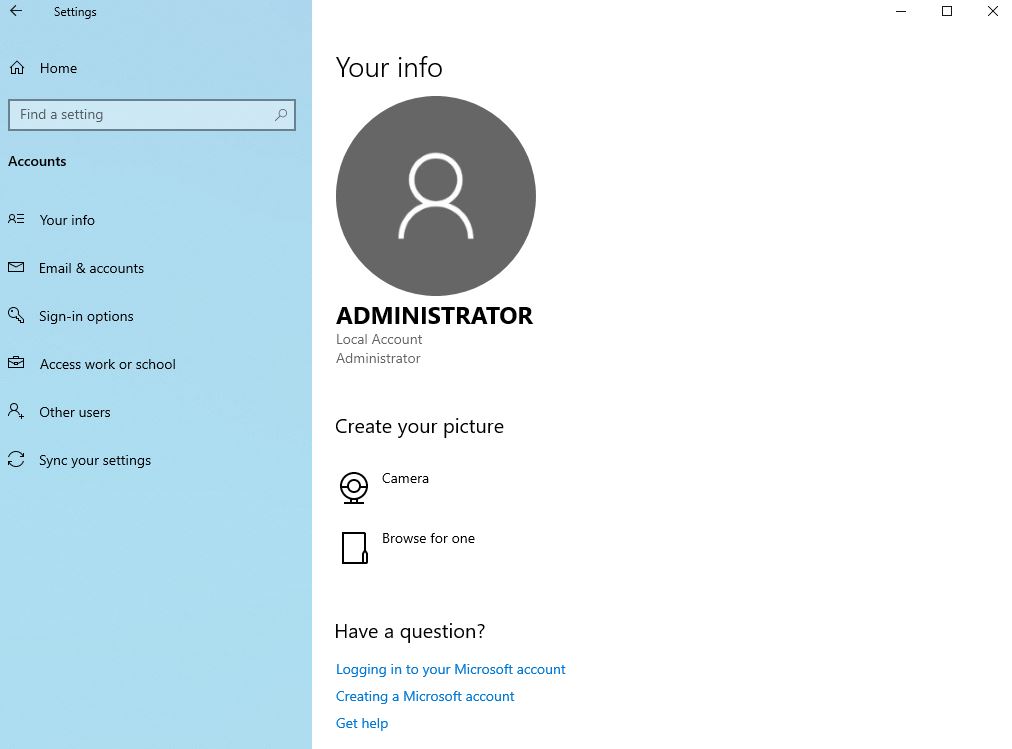
There are six tabs in this windows:
- Your info
- Emails & accounts
- Sign-in options
- Access work or school
- Other users
- Sync your settings
Our goal in this post is to teach you how to manage your accounts with a view to providing more security. So in these tabs and settings, we will only refer to those that are in this direction.
Note: I signed-in to my computer with Administrator account.
Other users Tab
In this tab and in the right panel, we can see all user accounts of this computer, including Tony Grant.
We click on Tony Grant:
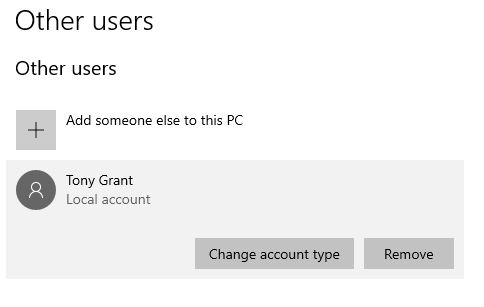
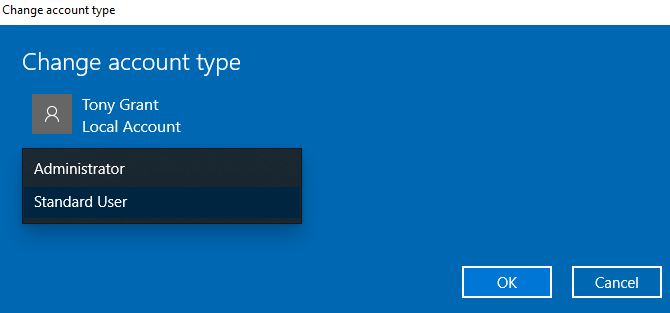
We click Change account type. A dialog box like the one below will appears in which we can easily change the type of this user account and then click the OK button:
There are another options in other users tab. We can create a user account by this tab. For this, we click on Add someone else to this PC option. Immediately computer management console (Account Management section) appears. You have learned how to work with.
Sign-in options Tab
The settings in this tab are very important and can help increase security.
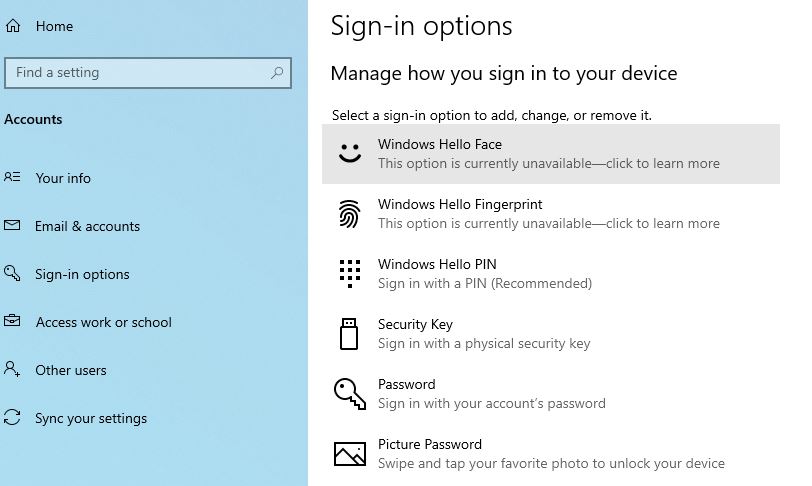
Windows Hello (Face, Fingerprint and PIN)
To use this options, your computer must be equipped with a camera (for face mode) or fingerprint scanner (for fingerprint). Windows Hello lets you sign in to your devices, apps, online services, and networks using your face, iris, fingerprint, or a PIN. You can rest assured that the info that identifies your face, iris, or fingerprint never leaves your device.
The data that is collected (like iris sensor, or fingerprint reader) is first encrypted and then stored on a computer. Encrypting this data is an important part of your peace of mind.
A personal identification number (PIN) is a numerical code. The core purpose of a PIN is to provide an additional layer of security to the electronic transaction process.
To turn on Windows Hello, select the Windows Hello method that you want to set up, and then select Set up. Also, to remove Windows Hello and any associated biometric identification data from the device, select the Windows Hello method you want to remove, and then select Remove.
If you want to enable Windows Hello PIN, the account with which you are currently logged in to the computer must has a password. Windows ask you this password at the beginning of the activation process to authenticate you. Then following box t appears:
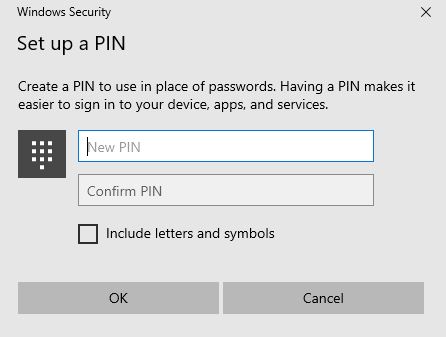
This dialog box closes when you set the PIN. Now, the Settings window and the sign-in options tab look like this:
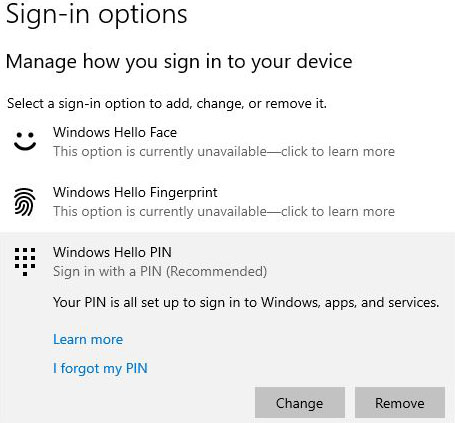
As you can see, you can change the PIN. There is also a mechanism for you if you forget the PIN. Also, you can delete it.
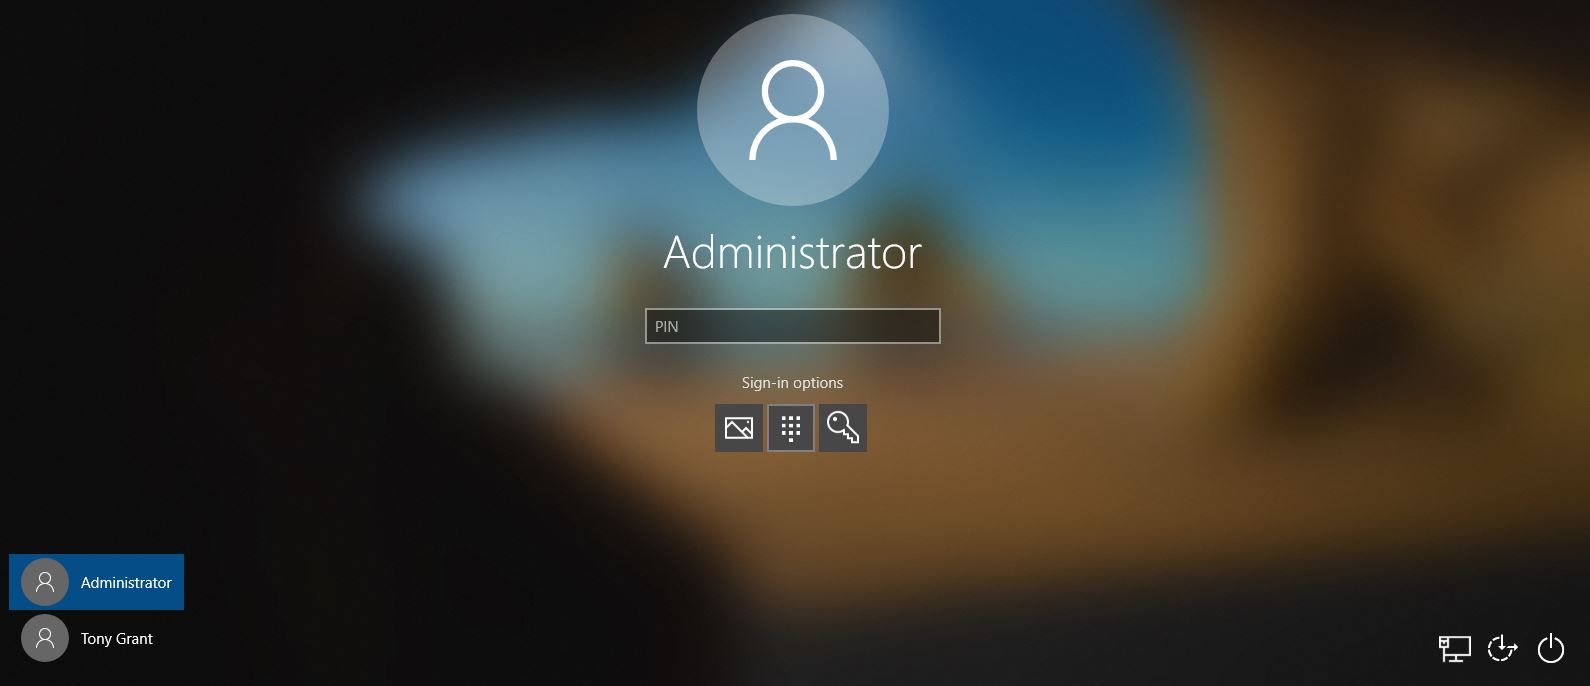
Let’s see what changes will be made to Windows if we enable the Windows Hello options. Among the available options, we have activated Windows Hello PIN. I sign-out Windows. Now, I want to sign-in again.
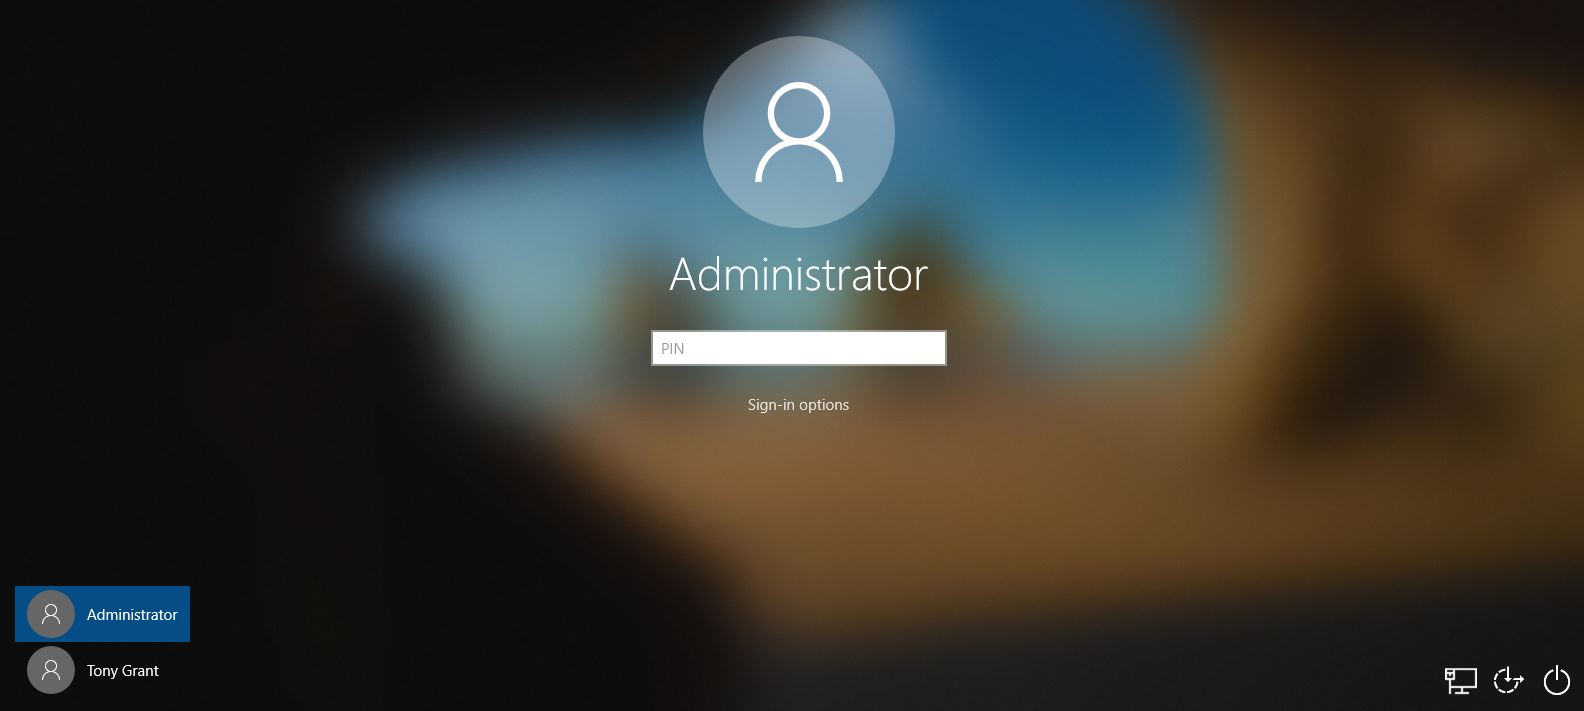
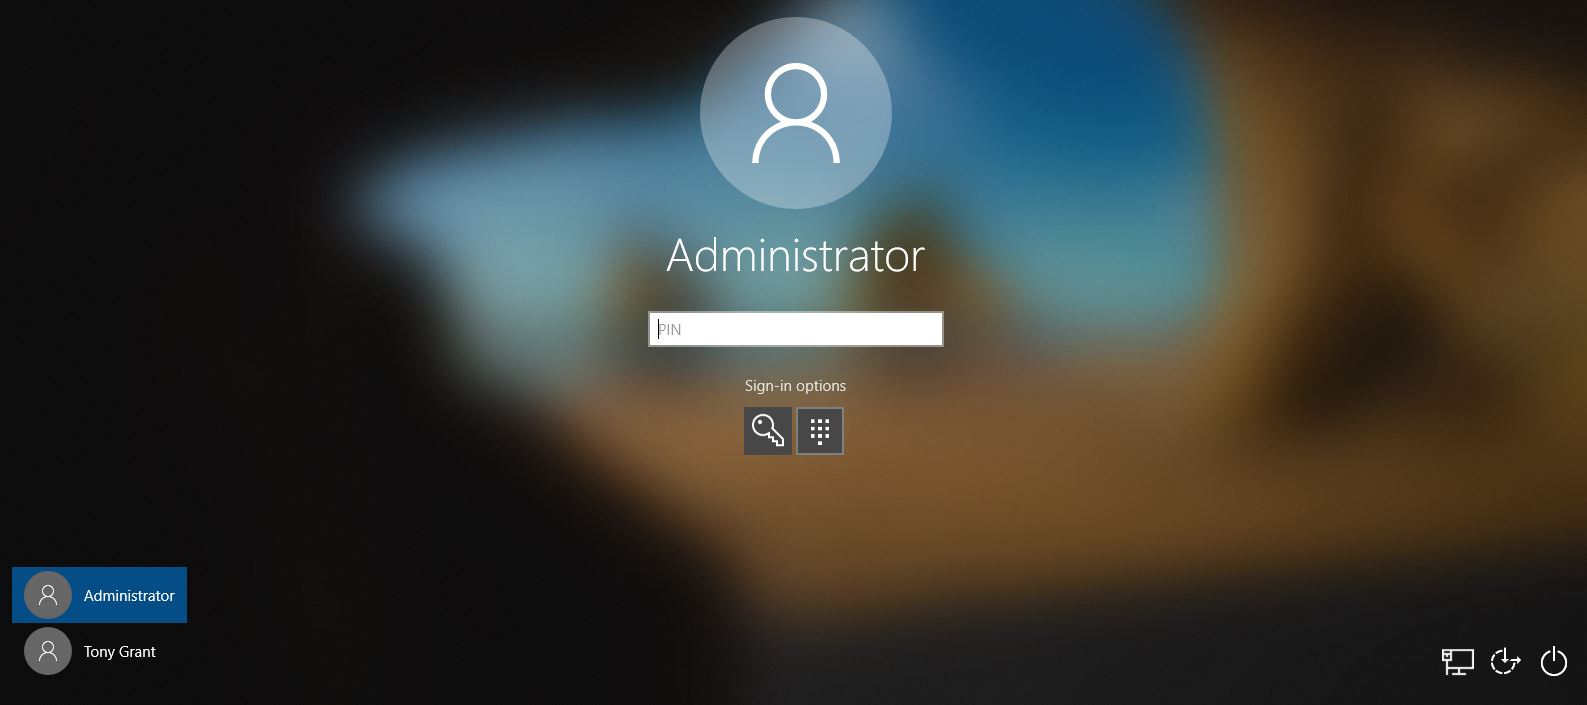
I can enter password to sign-in. It is common way but I enabled Windows Hello PIN also. As shown in the figure, there is sign-in options at the bottom of the box (password box). I click on this phrase. The login page looks like this now:

In fact, I have two sign-in options:
- With Password (key)
- With PIN (dots)
I choose PIN and then I enter PIN number.
Note: If I want to sign-in to Tony Grant’s account, there are no sign-in options.

Why? Because we have activated Windows Hello PIN in the administrator account. So these settings should be enabled per user accounts (if needed)
Security Key
A security key is a hardware device that you can use instead of your user name and password to sign in to Windows. Learn more about security keys.
Sign-in with physical security key. In sign-in options tab, Click Security Key option.
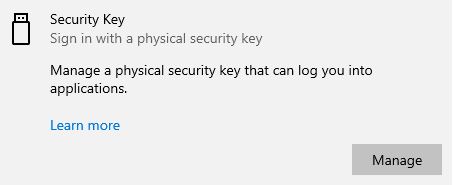
Now, click Manage and follow the instructions.
Password
This option is actually the common and default option. Here, if we select this option, we can either set a password or change the password for the account with which we have logged in.
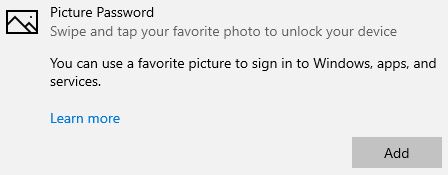
Picture Password
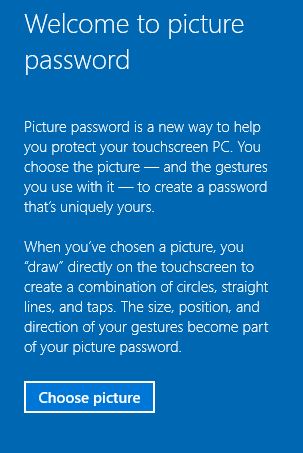
Swipe and tap your favorite photo to sign-in to windows. Picture password is a feature introduced with Windows 8. The picture password is the combination of three gestures that you perform in a specific order on the picture that you chose for this task. The picture password is associated with your user account and can be used as a replacement for your password. However, you cannot have a user account that logs into Windows 10 with a picture password and has no password associated with it.
To create a picture password in Windows 10, click the “Add” button under the “Picture password” section.
Enter your Microsoft account password into the “Create a picture password” window that appears to verify your credentials and then click the “OK” button to continue.
Now, click Choose picture button and select your favorite phot.
Then this photo will be displayed for you. First, click on “Use this picture” in the left panel.
Now, you draw three gestures on your picture using your touchscreen. You can use either straight lines, circles, or taps. You must remember these gestures, as you must replicate them on the picture in order to log in when using the picture password in Windows 10 in the future! As you make each gesture, the highlighted number at the left side of the screen changes to indicate each gesture as it is created and accepted.

After making the third move or the third choice, you have two options:
- Change the gestures: For this purpose, click on the Start Over button.
- Applying the gestures: For this purpose, drew your gestures again – exactly the same as the previous time.
If everything is correct, the Finish button will appears in the left panel. Click it.
If you save this configuration, the next time you try to log in to Windows, you will see the following page, Picture Password added to sign-in options.
You can choose Picture Password for sign-in:

Now, you must click on your gestures. If you click all three gestures correctly, you will sign-in to Windows.

A Microsoft account provides you with an identity that you can use to sign in on multiple devices and access online services.
If Windows 10 detects an Internet connection during setup, you are prompted to specify your Microsoft account details. However, you can link your Microsoft account to a local or AD DS domain account after setup is complete.
After you connect your Microsoft account with your local account, you can:
- Access personal Microsoft cloud services, including OneDrive, Outlook.com, and other personal apps.
- Use the Microsoft account to access Microsoft Intune, Microsoft Office 365, and Microsoft Azure.
- Download and install apps from the Microsoft Store.
- Sync your settings between devices that are linked to your account.
Source of this section: Exam Ref 70-698, Installing and Configuring Windows 10, PUBLISHED BY Microsoft Press, a division of Microsoft Corporation, One Microsoft Way, Redmond, Washington 98052-6399
So, we can sign-in to Windows with our Microsoft account. In fact, Microsoft recommended this account for sign-in to Windows.
Signing up for a Microsoft account
If you have not a Microsoft account, you can create it. You must in signup.live.com website, create an outlook.com or hotmail.com account.
To connect your Microsoft account to your local or domain user account, use the following procedure.
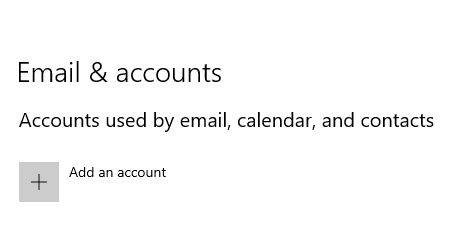
1- In Settings, click Accounts. Then go Emails and accounts tab.
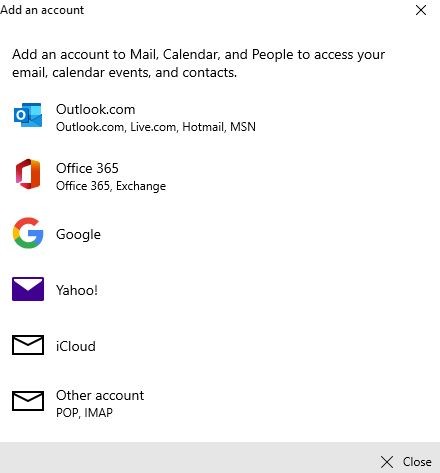
2- Click Add an account. Add an account dialog box appears. Click on outllok.com option in this dialog box.
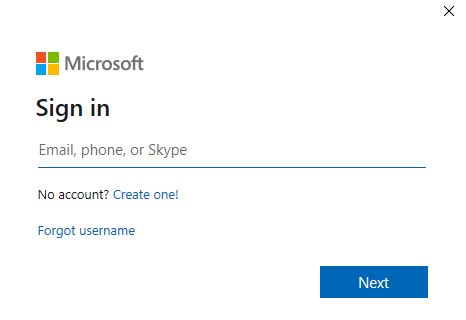
3- On the next page, enter your Microsoft account and click the Next button. You can also click on create one option on this page to create an account.
4- On the next page, you must enter the password for this account. Ok. Thanks. Your computer is now connected to your Microsoft account.

You may want to sign in to Windows with your Microsoft account instead of your local account from now on. It’s Great idea. To do this, follow these steps:
1- In Settings, click on Accounts.
2- In Your Info tab, click “Sign in with a Microsoft account instead”. Windows will ask your Microsoft account information. (Account and password)
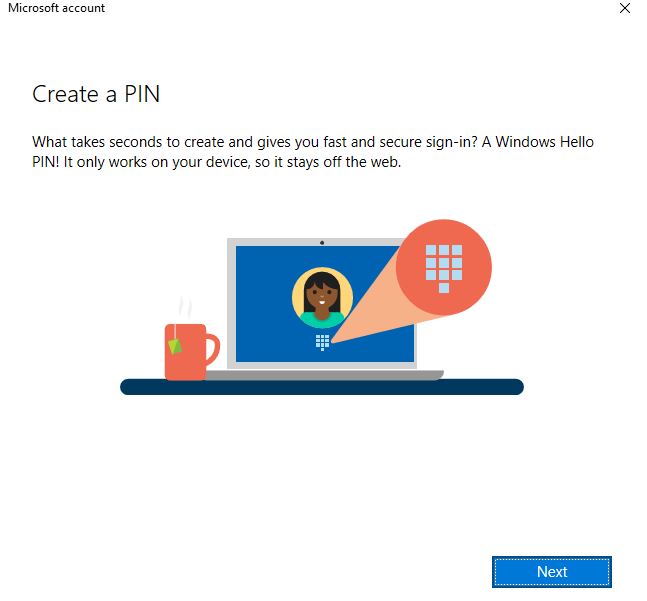
3- Then Windows ask you to enter a PIN. You must determine and enter a PIN.
4- Ok. This process is complete.
5- Now, Sign out and then sign in. As you can see, you can sign in to Windows with your Microsoft account.